Roast Chicken with Saffron, Honey, Red Onions and Pistachios


Serves 4
This dish tastes amazing. The combination of cardamom, saffron, rosewater and pistachios is as fragrant as a spring garden. It is as colourful too. The red onions and yellow saffron contrast well with the green pistachios. You could add to these colours with fresh parsley and pomegranate garnishes.  It is based on a recipe by Ottolenghi

4 chicken breasts
4 tbsp olive oil
1 tsp cardamom
a pinch of saffron threads
juice of 1 lemon
100 g honey
1 tsp each of salt and  pepper
2 red onions, cut into 8 wedges each. Cut through the root end so the sections stay together
1tspn sugar and pinch salt
100g pistachios, ground
2 tbsp rose water

In a large bowl, mix the chicken breasts with 2 tbsp olive oil, cinnamon, saffron, lemon juice, 50g honey and salt and pepper. Leave to marinate for at least an hour, or overnight in the fridge.
Mix onions with remaining 2 tbsp olive oil, sugar and salt.
Spread onions on baking dish lined with baking paper. Cook at 150 C for 30 mins.
While the onions are roasting, mix the remaining 50g honey and nuts together to make a rough paste. 
Remove onions from the oven pour the chicken marinade over them. Mix gently to avoid breaking up the wedges. and push to the perimeter of the pan.
Place the chicken breasts in the centre of the pan and top with the pistachio mixture.
Return to the oven for 30 mins, or until the chicken breasts are cooked. If they’re undercooked they will feel soft when pressed. If they’re giving off liquid, they’re overdone. Getting them firm, but before they exude their juice can be tricky and depends on the size and thickness of the chicken.
Place chicken on the plate first.
Then add the rosewater to the onions and juice left in the pan, toss gently and serve alongside the chicken.


Peanut or Nut Brittle

This is a recipe I am developing. Use it, but use your own discression.
The nuts can be toasted or untoasted, or even a mixture. Not sure about this quanitiy. Using two varieties of nuts will make it difficult to get them both to properly browned at the same time. If in doubt, toast them seperately, add them to the toffee and only cook until they've stopped forming a ball in the toffee.
I am trying to make a bitter, salty, thin brittle with lots of nuts. If you don't like it like that, reduce the salt, temperatures, quantity of nuts and size of pan.
2c sugar
1c corn syrup
1t salt
2T water
1T butter
1-2t bi carb soda
1t vanilla
350 - 500g
Flaked salt to sprinkle on the top
Boil sugar, corn syrup and water until caramel stage is reached, at least 180-193.
Add nuts and reheat until they no longer form a lump and they are the required colour. The nuts will colour at a lower temperature than the sugar will turn to caramel stage, so no need to use thermometer here.
Add butter, bi carb and vanilla.
Heat 2 lamington tins in the oven, so the toffee spreads more easily. 
Spread out in 1 or 2 pans. Pull, lift and stretch with 2 forks to thin. But be careful not to deflate the bubbles made by the bi carb as these give a light texture.

Putting the Buttery Crunch in Peanut Brittle

Raw nuts, butter, and baking soda are secrets to richly flavored, delicate brittle

by Flo Braker
from Fine Cooking 
Issue 24
Candy is a frivolous thing with no other purpose than to delight, and that's why it's so wonderful. But for many home cooks, candymaking is becoming a lost art. They think of candy as complicated and technically difficult, but the truth is that a lot of candies are quite simple to make. When the holidays come around, along with the usual assortment of cookies, I like to give homemade candy, and peanut brittle is one of the quickest, easiest candies to make. With just a few ingredients, most of which I have on hand, I can make wonderful homemade peanut brittle in less than an hour and a half from start to delicious finish.
Baking soda and butter make a more delicate brittle

Baking soda adds bubbles—millions of minuscule ones that make the brittle more porous. Take the syrup off the heat before adding the baking soda so it doesn't foam out of the pan.
Sugar syrup is the foundation of candymaking. To make peanut brittle, the sugar syrup must be cooked to what is called the hard-crack stage. That means that the syrup solidifies when cooled, breaks easily when snapped, and no longer feels sticky. At this stage, the syrup will register between 305° and 310°F on a candy thermometer.
The trick, though, is to make a candy that's truly brittle so that it breaks when you bite it, rather than a hard candy that must be sucked like a lollipop or toffee. By adding baking soda to the sugar syrup, you unleash a zillion minuscule air bubbles that give the candy a porous, delicate texture. Butter also helps to make the candy tender and easier to chew, as well as adding its own rich flavor.
Raw peanuts give better flavor
fca24br54-02.jpg
The peanuts toast and even pop a bit as the sugar syrup turns a rich, light-golden color. They'll flavor the syrup as they cook and make the brittle taste nuttier.
For candy with a rich peanut flavor, use raw nuts: the Spanish variety (with red, papery skins) or blanched raw peanuts. Raw nuts can be added relatively early in the cooking process. They'll flavor the syrup as they cook and give the brittle a nuttier taste. Look for Spanish or blanched raw peanuts in well-stocked supermarkets or in health-food stores.
If you use roasted nuts, however, add them at the end of the cooking time. If added too soon, roasted nuts could burn and leave the candy with a bitter taste. Warm roasted nuts first in a 250°F oven. Adding cold nuts to the hot syrup could cause it to seize and crystallize. Also, if the nuts are salted, omit the salt in the recipe.
Other nuts—particularly soft-textured ones like pecans, cashews, and walnuts—are more susceptible to burning, which can make the candy bitter. If you want to make brittle with any of these nuts, add them when the sugar syrup has almost finished cooking, at around 290°F.
Stretching makes the candy thin
fca24br54-03.jpg
Thick gloves are a must for protecting your fingers from the hot candy. Stretch the brittle as thin as you can so that the nuts are just barely bound together with the thin, crunchy candy.
Stretching the candy while it's still hot and pliable makes a thinner brittle that's easier to eat. It takes less than a minute for the mixture to cool enough so that you can begin stretching. Wearing rubber gloves so you don't burn your hands, lift the edges and pull gently. If the peanut brittle is still too hot, wait five seconds and try again. Don't just pull along the edges but from the middle, too, to make the brittle as thin as possible. The nuts should be just barely bound together with tender, crunchy candy.

Bee Sting Cake

Cake
2 1/4 teaspoons (or 1 1/4-ounce package) instant yeast (not active dry) (also sold as rapid rise or bread machine yeast)
3/4 cup whole milk, ideally at room temperature
1/4 cup granulated sugar
2 cups all-purpose flour
3/4 teaspoon table salt
2 large eggs, ideally at room temperature
4 tablespoons unsalted butter, at room temperature
Honey-Almond-Crunch Topping
6 tablespoons unsalted butter, cold is fine
1/3 cup granulated sugar
3 tablespoons honey
2 tablespoons heavy cream
1 1/2 cups (4 3/4 ounces) sliced almonds
Two pinches of sea salt
Pastry Cream Filling
1 cup whole milk
Seeds from 1/4 to 1/2 vanilla bean, or 1 teaspoon pure vanilla extract or 1/4 teaspoon almond extract
3 large egg yolks
1/4 cup granulated sugar
3 tablespoons all-purpose flour or cornstarch [updated]
2 pinches sea salt
2 tablespoons unsalted butter, cold is fine
Make the cake: Combine all of the cake ingredients in a medium-sized mixing bowl, stirring till the mixture becomes cohesive, then stirring for two minutes more. In a stand mixer, you can mix this with the paddle attachment (no dough hook needed; batter is thin) at low-medium speed for 2 to 3 minutes. Scrape down sides, cover with plastic wrap and let rise in a draft-free place for 60 minutes, till it’s a little puffy. (It won’t fully double; this is fine.)
Butter a 9-inch round cake pan. Stir the batter a few times to deflate it slightly, then scrape it into the prepared pan and nudge it until it fills the bottom. Cover again with plastic wrap (don’t let it drape in and touch the top) and set aside for another 30 minutes.
Meanwhile, make the honey-almond-crunch topping: In a small or medium saucepan over medium heat, heat the butter, sugar, honey, cream and salt until the butter is melted. Bring to a simmer and let it boil for 3 to 5 minutes, until the mixture becomes a shade darker (it should go from a yellowish tone to a light beige), stirring frequently. Stir in the almonds. You will probably panic because this mixture is going to get very thick — but don’t. Set it aside to cool slightly.
Heat your oven to 350 degrees.
Once the cake has finished its second rise (again, it’s not going to rise a lot; don’t sweat it) use a small spoon to scoop out small amounts of the almond topping and distribute it over the top of the cake. It’s going to be a little pesky because it is firm, but I promise (see above: multiple photos of this process to ease your worry), even if it’s not perfectly evenly distributed, it will all smooth out gorgeously in the oven.
Bake cake on a foil-lined tray to catch any caramel drips, for 20 to 25 minutes, until top is bronzed and toothpick inserted into the center comes out batter-free. (Caramel on it is fine, and should be tasted.) Transfer to a cooling rack and let it sit in the pan for 10 minutes. After 10 minutes, run a knife along the outside of the cake, making sure no places are stuck and invert the cake onto the cooling rack. If you’re like me, you’ll be positive that all of the almonds will fall off, but shockingly, in five rounds, I only lost one or two. Reverse it back onto another rack to finish cooling, replacing any almonds that fell off right back on top. They’ll merge back with the caramel as it cools; nobody will know.
Make pastry cream: Warm milk and vanilla bean scrapings (if using; if using an extract, don’t add yet) in a medium saucepan. Pour into a small bowl or cup, ideally with a spout. Set aside. Rinse saucepan with cool water, to rinse and cool; wipe to dry. Off the heat, whisk the yolks and sugar vigorously together for a minute, until pale and ribbony. Whisk in flour and salt until smooth. Drizzle in warm milk mixture, a spoonful at a time, whisking the whole time. Once you’ve add half of it, you can add the rest in a more steady stream, again whisking the whole time. Return the saucepan to the stove and cook on medium-high heat until it bubble, then simmer for one to two minutes, more whisking the whole time. Off the heat, whisk in the butter and any extracts you may be using. Cool custard completely before using, a process that can be sped up in the fridge or whisking it over a bowl over ice water.
Finally, assemble the cake: Once both the cake and pastry cream are fully cooled, place the cake on a serving platter and divide it horizontally into two layers with a long serrated knife. Spread pastry cream over bottom half. Place top half on pastry cream. Serve in wedges; watch out for bees. Refrigerate any leftovers.

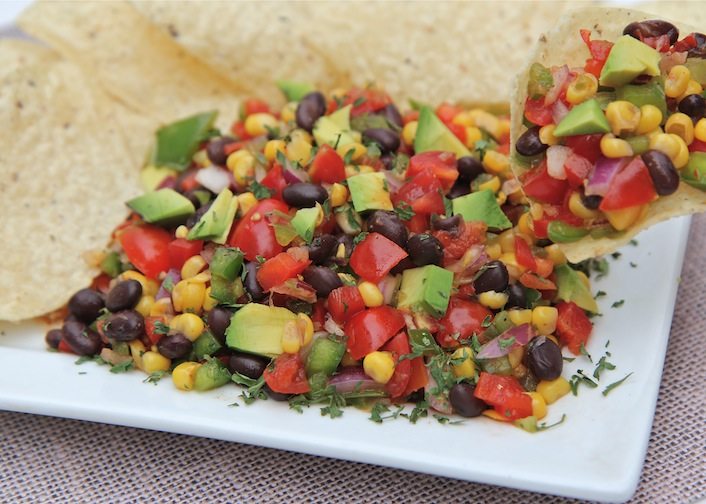
Black bean and corn salsa


2 x 400g cans black beans, drained and rinsed or 1/2 cup dried beans, prepared (see below)
1 ½ cups corn kernels, thawed
1 capsicum, finely diced
1 cup finely diced celery
¾ cup minced red onion, salted for 20 mins, then rinsed under boiling water
1 fresh chilli, seeded and minced
½ cup chopped coriander
I avocado, diced

Lime dressing
¼ cup fresh lime juice
2 tsp  grated lime zest
2 tbs brown sugar
1 tbs Dijon mustard
S + P to taste
¼ cup vegetable oil

1. In a large bowl, combine all salad ingredients, except avocado.

2. In a small bowl, combine all dressing ingredients, except the oil. Mix together, then gradually whisk in the oil.

3. Pour dressing over salad, and stand one hour before serving.

To prepare black beans cover with water, heat and simmer for 2 minutes. Allow to stand for 1 hour, then drain, cover with lots of water and simmer 20-30 minutes. Don't allow them to boil at this point or their skins will split. 

Microwave Custard

2 egg yolks
2 heaped tablespoons cornflour

1 teaspoon vanilla essence
2 cups milk
2 tablespoons caster sugar
1.      Whisk egg yolks, cornflour and vanilla to a smooth paste with a tablespoon of the milk.
2.      Place remaining milk and caster sugar in a separate microwave bowl. I use a clear Pyrex 4 cup jug. That way I can see through the window when it boils and the jug is big enough for it to not boil over.
3.      Heat milk in microwave until it boils. This takes 5 minutes in my microwave, but will be different in yours. It must boil or the custard will not thicken.
4.      Remove from microwave and pour into the egg yolk mixture, whisking as you do this.
5.      Whisk until thick.


Chewy and Gooey Pistachio Friands

120g pistachios
200g icing sugar
200g butter, melted
5 egg whites
80g flour

Preheat oven to 180 deg C. Prepare 6 friand or cup cake tins by either greasing and flouring, or lining with patty cake liners.
Grind the pistachios in a food processor until very very fine. This will take 3-5 minutes.
Add icing sugar and continue to grind even more finely.
Add melted butter and process  to incorporate.
Whisk egg whites until they’re foamy.
Add the pistachio mixture.
Gently fold in flour. Be careful not to over mix the flour.
Pour into prepared moulds and bake for 30 mins.
These keep for a long time, but are at their best fresh out of the oven when the outside of the cakes is chewy. The inside will be more moist than normal friands. .


Char grilled corn on the cob

Microwave corn cobs for 4 mins each. This gives them an initial steam cook and loosens the husk for easy removal
Cut 2.5 cm off the bottom of the corn. Grasp the top of the husk and shake gently. The corn will drop out completely husked
Place on hot bbq to char the corn kernels, rotating only after each side has picked up a bit of char.
Brush with melted butter and serve immediately.  

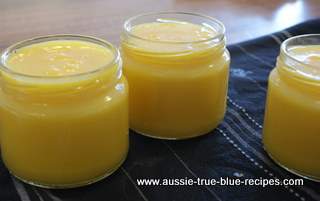
Lemon Butter in the Microwave

·      200g caster sugar
3 eggs
250 ml fresh lemon juice
100g unsalted butter, melted
Zest of a lemon or two (optional)
Pour boiling water into glass jars to sterilise them.
In a microwave bowl, whisk together the melted butter, caster sugar and eggs until smooth. Stir in lemon juice.
Cook in the microwave for one minute intervals, stirring after each minute until the mixture is thick enough to coat the back of a metal spoon.
Remove from the microwave, and pour into small sterilised jam jars. Store for up to three weeks in the fridge.

Peanut Biscuits

125g butter
230g castor sugar (scant ¾ cup)
150g SR flour (1 large heaped cup)
1 egg
¾ cup unsalted peanuts
Cream butter and sugar.
Add egg and beat.
Fold in flour and peanuts.
Cook at 150 for 10-15 mins. They should be brown only around the edges.
This recipe is from Leila, Ted Hudson’s mother. Granny often made these for us and they’re really yummy.)

South East Asian Beef Curry

Not a beef rendang because there’s too much sauce. Not a massaman curry because there’s no potatoes. This is a compilation of my favourite curry ingredients, served as Mum served her sweet curry and rice back in the 60’s. The sauce lacks 2 things – chilli and coconut milk. But it is thick with spices. You’ll need a blender or food processor for this recipe.

2 onions, chopped
2 tbsp neutral flavoured oil (not olive)
1 tbsp chopped fresh ginger
1 tbsp chopped galangal (or another tbsp of fresh ginger)
1 tbsp chopped garlic
1-2 stalks lemongrass
6 kaffir lime leaves
½ cup desiccated coconut
1 cinnamon stick
750g beef cut into 1cm cubes
2 tbsps soy
1 tspn red curry paste
1 tbsp tamarind water or juice of a lime

Fry onion with a little salt in oil until just browned.
Process finely galangal, ginger, lemongrass, garlic, kaffir lime and desiccated coconut. Add enough water to ensure it processes finely. Reserve 2 tsps. to add later. Fry remainder with the onions for 30 seconds.
Add beef, cinnamon stick, tamarind, curry paste and soy. Add enough water to just cover meat, stir to combine, and place in oven at 90 degrees Celsius for at least 3 hours, or until tender.
To serve, place plain rice in the centre of a plate, and make an indentation in the middle. Place curry in the indentation. Place accompaniments around the curry.

Accompaniments
Tomatoes chopped combined with fresh coriander
Bananas mixed with desiccated coconut
Cucumber grated and combined with yoghurt
Poppadums
Sweet chutney


Lemon cake

This cake has an intense lemon flavour and a crispy crust from the sugar put on top after baking. It is my favourite cake of all time, and that's saying something!

3/4 cup (180ml) vegetable oil  
2 eggs  
1 tablespoon finely grated lemon rind  
2 tablespoons lemon juice
1 cup (280g) thick natural yoghurt  
1 3/4 cups (385g) caster sugar  
2 cups (300g) self raising flour   
Crunchy Lemon Topping 
3/4 cup (120g) granulated (not caster) sugar  
1/4 cup (60ml) lemon juice    

Preheat oven to 180 degrees.  
Place oil, eggs, rind, lemon juice, yoghurt and sugar in a bowl and whisk to combine.  
Sift over flour and stir until smooth.  
Pour the mixture into a greased 24cm ring or loaf tin and bake for 35 minutes or until cooked when tested with a skewer.  
To make the lemon frosting, gently stir together the sugar and lemon juice. Spoon over the cake while it is still in the pan and allow to set. 
 Serves 10-12  

Pistachio Rose Cake Recipe

Created by Steve Parle and Emma Grazette
12 filo pastry sheets, cut into 30 cm (12 inch) discs
75 g (2½ oz) butter, melted
300 g (11oz) pistachios, roughly chopped
4½ tbsp honey
4½ tbsp rosewater
500 ml (2 cups/18 fl oz) cream
dried or fresh rose petals, (optional) 

Preheat the oven to 160˚C (325˚F/Gas 3). Line two baking trays with baking paper, then butter the baking paper.

On the baking tray, divide the filo discs into three piles, painting a little butter in between the layers of each pile. Mix the nuts with the cumin seeds, honey and 3 tablespoons of the rosewater, then spread one-third of the mixture over each pile. You will have three stacks of filo and pistachio mix. Bake in the oven for 20 minutes until the pasty is golden.

When cool, beat the cream with the remaining rosewater until you have soft, undulating waves. Spread the cream over two of the pastry stacks, then layer the stacks on top of each other, finishing with the stack without cream. Scatter with the rose petals and serve. 

Homemade Nutella (yes it is possible!)


• 2 cups (225g) hazelnuts
• 1 cup icing sugar
• 1/4 cup cocoa powder
• 1 tablespoons vegetable oil
• 1 teaspoon vanilla extract
• teaspoon salt

Adjust oven rack to middle position and heat oven to 375 degrees. Place hazelnuts in single layer on rimmed baking sheet and roast until fragrant and dark brown, 12 to 15 minutes, rotating baking sheet halfway through roasting. 

Transfer hazelnuts to medium bowl. When hazelnuts are cool enough to handle, place second medium bowl on top shake vigorously to remove skins.

Process peeled hazelnuts in food processor until their oil is released and it forms a smooth runny paste, about 5 minutes, scraping down bowl often.

Add sugar, cocoa powder, oil, vanilla, and salt and process until fully incorporated and mixture begins to loosen slightly and becomes glossy, about 2 minutes, scraping down the bowl as needed.


Transfer spread to jar with tight-fitting lid. Chocolate-hazelnut spread can be stored at room temperature or refrigerated for up to 1 month.

makes 1 1/2 cups
Keena's notes
This makes a dark chocolate version. You could add less cocoa powder and a little milk powder for a milk choc version. 
Frangellico would make a delicious addition instead of the oil. Especially good for breakfast!!

Adapted from Cook's Illustrated

Naomi's Choc Chip Cookies

Adapted from the New York Times recipe
300g butter, softened
175g brown sugar (1¼ cups)
200g caster sugar (1 generous cup
1 ½ teaspoons salt
2 teaspoons vanilla extract
2 eggs
3 1/4 cups plain flour
1 1/4 tspns bi carb soda
1 1/2 tspns baking powder
500g choc chips - preferably flat discs so they form layers
Sea salt  

1. Using an electric mixer, cream butter, sugars, salt and vanilla together until very light, about 5 minutes. Add eggs, one at a time, mixing well after each addition.
2. Reduce speed to low, add flour, bi carb soda and baking powder and mix until combined. Add choc chips.
3. Refrigerate dough, covered, for 24 to 36 hours. Dough can be used in batches, and can be refrigerated for up to 72 hours.
4. When ready to bake, preheat oven to 180°C. Line a baking sheet with baking paper.
5. Scoop 6 100g mounds of dough (the size of generous golf balls) onto baking sheet. Sprinkle lightly with sea salt.
6. Bake for 18 to 20 minutes, until golden brown but still soft. Transfer sheet to a wire rack for 10 minutes, then slip cookies onto another rack to cool a bit more. Repeat with remaining dough, or reserve dough, refrigerated, for baking remaining batches the next day. makes: 24 12cm cookies.
Keena's note: I have made these with smaller balls of dough and they're just as delicious.
You could use glace ginger, m+m's, nuts, dried fruit as well as, or instead of, the choc chips. 

Rice Pudding with date and pistachio topping

1 litre milk
240ml cream
1 tspn vanilla extract 
1/2 tspn salt
120g arborio rice
300g sweetened condensed milk

Optional
200g pitted dates
3 tbsp pistachios

Bring milk, vanilla, salt and cream to the boil, add the rice and turn the heat down very low. 
Stir frequently till rice is soft and thick - 30-45 minutes. 
Add sweetened condensed milk and continue stirring and cooking for a few more minutes. Take off the heat. Allow rice to stand in the pot for 5 minutes before serving.
Meanwhile, cover dates with 1 cup of water and bring to the boil and simmer for 5 minutes.Lightly mash with a fork. 
Toast pistachios in the oven for 5 minutes. Once they have cooled, crush lightly.
Top rice pudding with dates and pistachios.

Mango Sticky Rice (in the microwave)


2 cups sticky (glutinous) rice
1 400 mls (14oz) coconut milk
1/2 cup sugar
pinch salt
½ tsp cornflour
½ tbsp toasted sesame seeds
2 ripe mangoes, cheeks sliced diagonally

1. Soak the glutinous rice in water for at least 3 hours before cooking.
2. When ready to cook, drain off excess water from rice.
3. Reserve ¼ cup of coconut milk and set aside for coconut sauce.
4. Add remaining coconut milk to drained rice and add water as needed to bring the level 1cm (1/2 inch) above the rice level.
5. Cover and microwave for 15 minutes at high, stirring 3 times during cooking.
6. Add sugar to the cooked rice, mix well and cook for another 5 minutes. Fluff rice.
7. To make coconut sauce, mix cornflour with a little water and add to coconut cream with salt. Microwave until thick, around 3 minutes.
8. Peel and slice ripe fragrant mangoes. If mangoes are not in season, use canned jackfruit, palm fruit or lychees.
9. Sprinkle toasted sesame seeds on rice and serve with mangoes on the side.
10.   For a different presentation shape tablespoons of rice into sushi shapes, drizzle with sauce, sprinkle with sesame seeds and top with mango slices.

Smoked Tomato Sorbet on Toast

1kg tomatoes
350 mls glucose syrup, appx
3 tbspns olive oil
1 tbspn red wine vinegar
Salt to taste

Puree tomatoes with oil and vinegar, then strain.
Measure amount of tomato juice and add half the amount of corn syrup. This will taste too sweet, but when frozen the sweetness will diminish.
Add salt to taste, remembering that the flavour of the salt will diminish on freezing too.
Add extra red wine vinegar if desired. Tomatoes vary in flavour so the balance of  salty, sweet and tart varies with each batch.
Freeze for at least 4 hours.
Form into quenelles using 2 spoons. You can find instructions here http://www.youtube.com/watch?v=MXcIZ4aRHBU
Place on toasted Italian bread, drizzle with olive oil and sprinkle with basil.

Boneless Skinless Chicken Breasts Poached modified from Cooks Illustrated recipe


Ingredients

4 boneless skinless chicken breasts
(Optional brine - 1/2 cup soy sauce, 1/4 cup salt, 2 tablespoon sugar, 6 garlic cloves, smashed and peeled)
4 litres or quarts water

Method

Pound thick end of chicken breasts until about the same thickness as the rest of the breast.
(Optional) Place in pot with water and brine  Stand at room temperature 30 mins.
Heat over medium heat until 77 Celsius or 175 Farenheight, stirring occasionally to distribute heat evenly.
Remove from heat, cover and stand 17 - 22 minutes. Check thickest part for doneness.
Drain and use.

Tamarind Pork Belly

Tamarind Pork Belly
Serves 4-6

The beauty of this recipe is that the meat sits in a tamarind sauce and retains moisture while the skin stays high and dry and develops a delicious crackle. Use pork belly with the bone out for easier carving, or bone in for juicier meat. Ask the butcher to score it, or score it yourself. How long your pork will take for the crackling to develop depends on how wet the skin is, and how hot your individual oven is. Serve with rice and a salad.


Quantity
Ingredients
Method


Preheat oven to 240.
Use a baking pan that will hold the pork snugly.
Line pan with alfoil or silicone paper.

2kg
Pork belly
Score skin along the lines where you want to eventually cut it. I often like thirds lengthwise, then thinner slices.
Rub salt into meat and place in prepared pan.

1tspn
Salt
2 tbsp
Brown sugar
Mix all other ingredients together.

Pour into pan, add pork and place in preheated oven. 
Roast until skin is blistered and brown, but not burned, around 30-60 minutes. Rotate pan if one area is browning more than another. If it gets too brown place a piece of foil loosely over the top.
Check the level of liquid and top up with water if it looks too dry. 
Turn the oven down to 180°C and cook for 25 minutes.
Once cooked, let the roast rest for 10 minutes before slicing.
2 tbsp
Tamarind puree from a jar
1 tsp
Masterfoods Diced Chilli
1 tbsp
Soy sauce
125 mls
Water


x

Best, crispiest, crunchiest pork crackling

This method reliably creates crunchy pork crackling. The aim is to first dry out the skin, and then blast it under high heat so it crackles. If the pork has been cryovacked the skin will be wetter than fresh pork and the result will never be as good. However, you can still get it to crackle. Sometimes I like to remove the skin and treat it separately from the meat. This way you can get rid of the fat that lies under the skin. The methods remain the same. This works for pork leg, shoulder or belly. There is no need to score the rind.

Mix together a paste a little thinner than toothpaste.
2 tablespoons bi carb soda
1 tablespoon salt
1 teaspoon vinegar

Pat the pork skin dry and spread this paste all over. Leave for at least 10 minutes, and up to 30 mins.
Rinse the paste off and pat dry with paper towels. This is an easier job if you use boiling water to rinse, but it isn’t necessary.
Rub the pork skin with 1 teaspoon salt.

Roast the pork as the recipe indicates. Remove the pork from the oven and let it rest at room temperature for 10-30 minutes.

Meanwhile, turn the oven to 250 C (500 F). Replace pork and roast until skin crackles, around 10 mins. You may need to rotate the pork to prevent some areas burning before others have crackled.